Mass document generation using Excel
We are pleased to introduce a new way to mass-generate documents using Excel. This is an easy way to use our API for mass document generation. You don't need to understand programming to use our API, as it is already built into a simple Excel file. Interested? Read below to learn how to use it!
First of all, download this file and open it. Allow the execution of the code if Excel prompts you to do so.
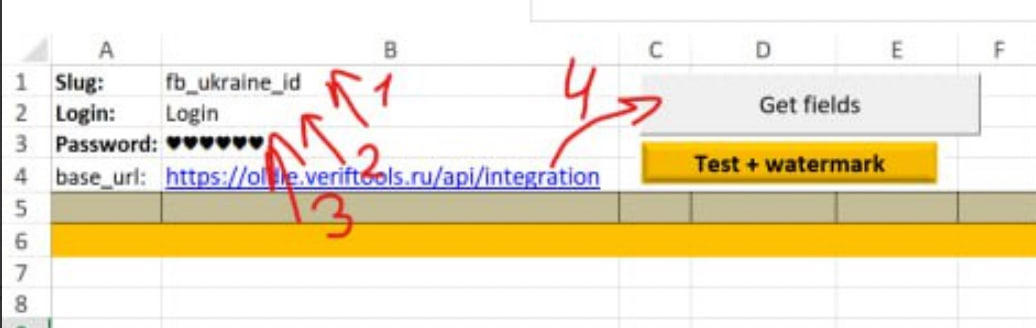
Now you need to log in. To do this, enter the username (2) and password (3) you use on the verif.tools website into the specified cells of the Excel file. To verify, click the "Get fields" button.
You also need to specify the generator slug (1). To do this, open the desired generator on the website and copy the last part of the URL, for example, for a US passport — usa_passport

If you have done everything correctly, after clicking the "Get fields" button, all fields of the selected generator will be displayed below in the Excel file. For example, for a Ukrainian ID card, we get this:
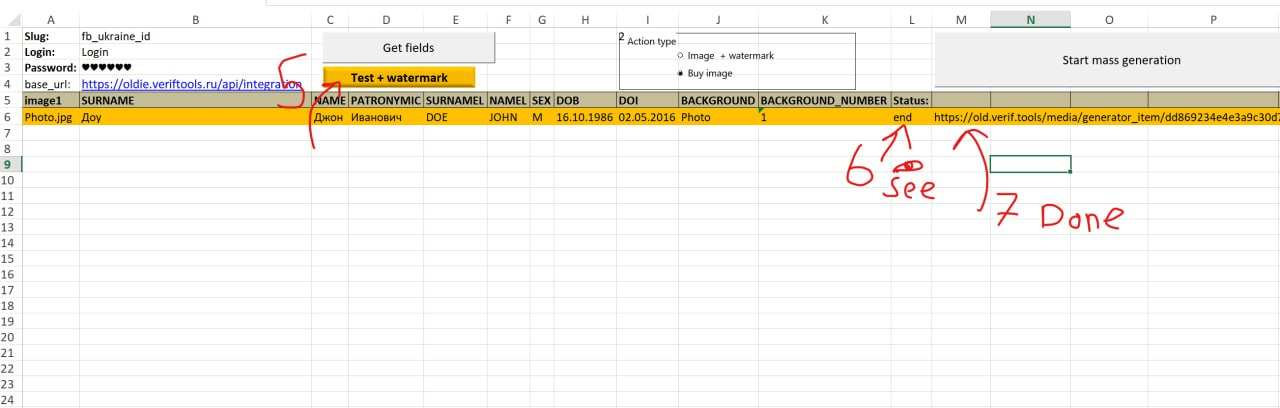
Now you need to enter the required data into the corresponding cells in Excel and run a test generation using the "Test + watermark" button (5). If the correct data is entered, after some time you will see the generation status (6) and a link to the generated image (7).
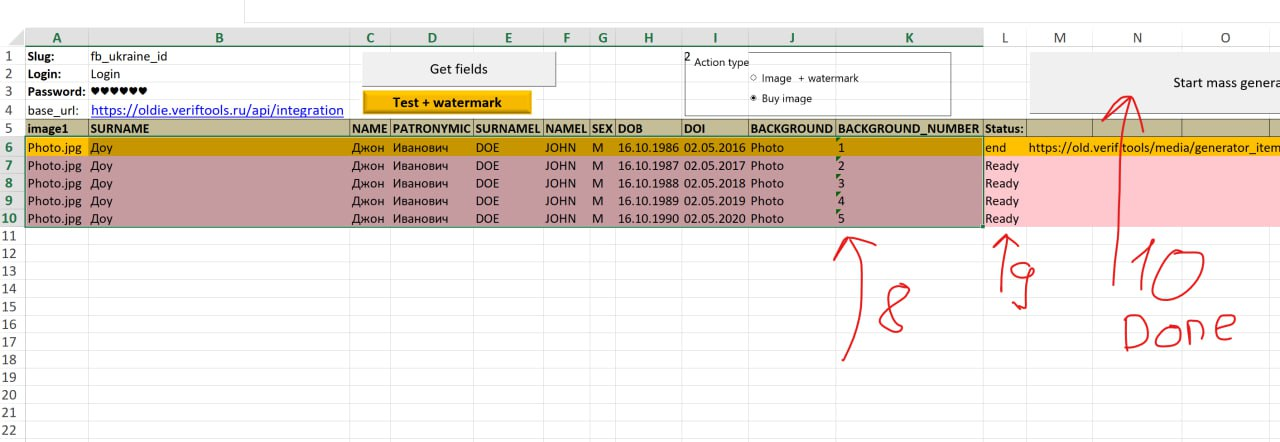
For mass document generation and automatic purchase, use the "Start mass generation" button (10). Pay attention to how data should be specified for each document. An example of correct usage is shown below in screenshot (8).
If you have any questions or suggestions, please contact support, and we will be happy to assist you!